
Google Search Console (GSC) is a free tool from Google for website owners. It helps you see how your website performs in Google search results. You can monitor data such as search traffic, indexing, mobile usability, security, and more.
For all of this, you need to connect your website to Google Search Console and verify your ownership.
Continue reading to learn the easiest method to add your website to Google Search Console, how to use its features and export reports.
How to Add Your Website to Google Search Console
You can connect your website domain whether WordPress or custom-made simply following the 3 steps:
Don’t have much time to read? Watch this 👇 step-by-step video tutorial and connect your site to Google Search Console in just 1 minute.
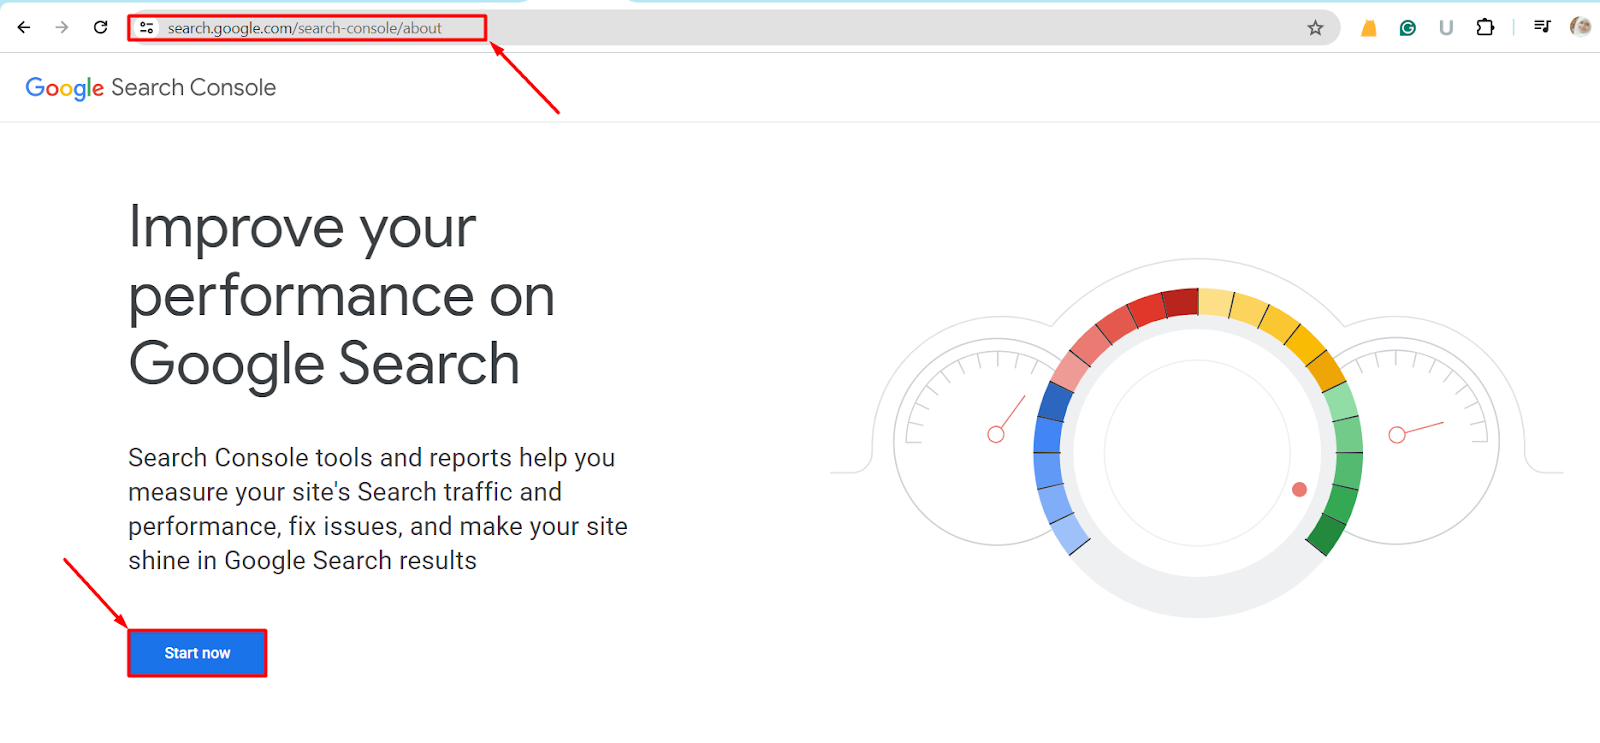
Step 1: Navigate to Google Search Console
- First, navigate Google Search Console
- Click on “Start Now”
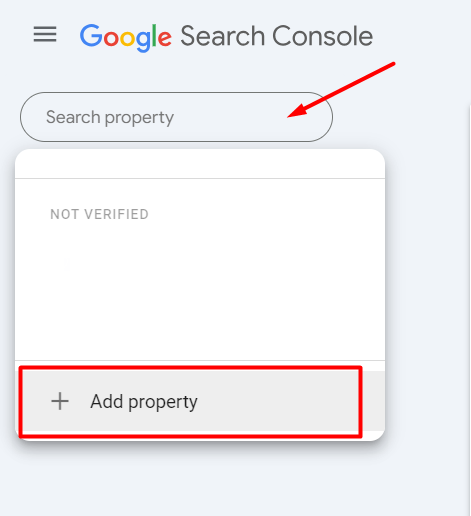
Step 2: Add a property
Next, you need to add your website domain. Click on “Search property” ➡ “+ Add property”. You can add multiple website domains/properties from here.
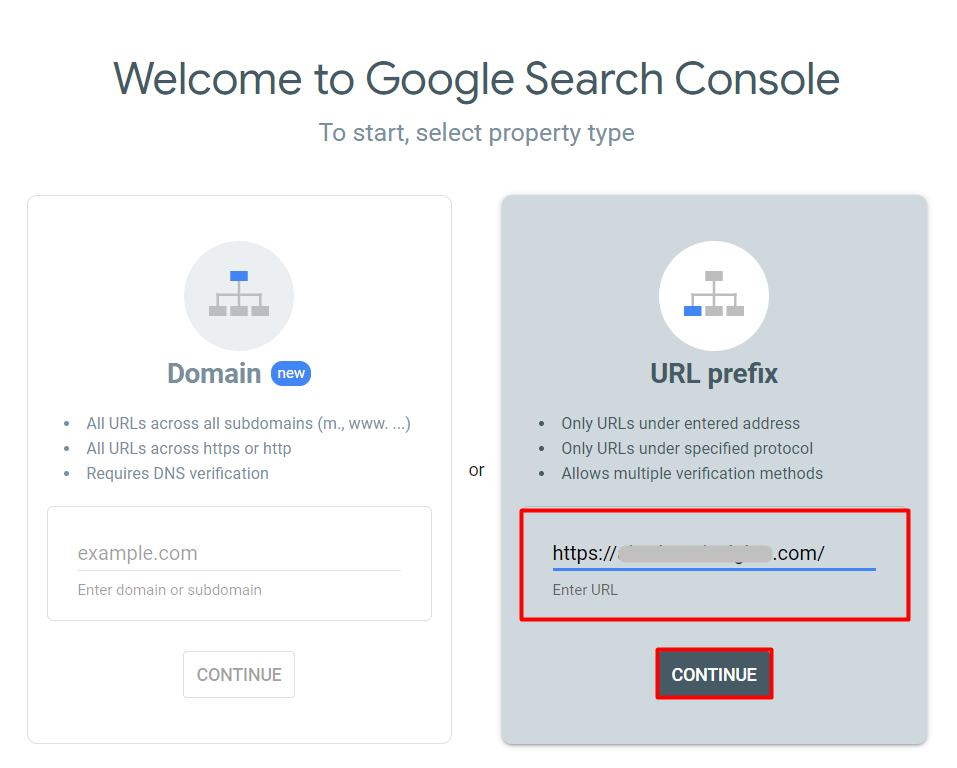
Now, you can see 2 options such as “Domain” and “URL prefix”. You can verify and connect your site using any option.
I would like to use the “URL prefix” option for its simplicity and flexibility. It’s also helpful if you don’t even have access to add a DNS record for verification.
Write your website’s full URL inside the “URL prefix” option. For instance, https://aiwebseoinsights.com/. Make sure, you’re using the right protocol like http or https.
- Next, click on “continue”
Step 3: Verify Ownership
Now, you have to verify the website ownership. You can find 5 options for owner verification such as:
- HTML file
- HTML tag
- Google Analytics
- Google Tag Manager
- Domain name provider
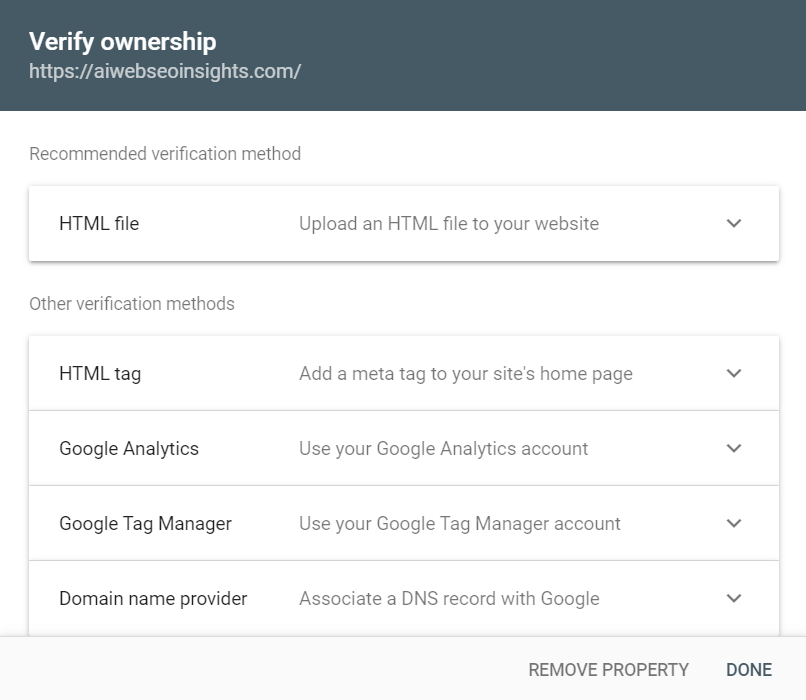
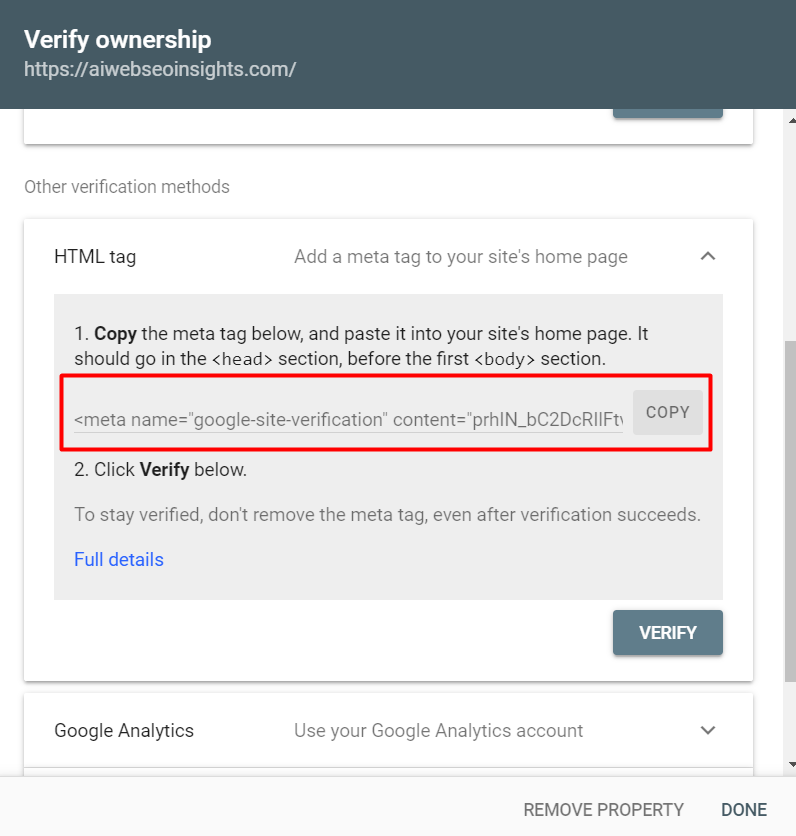
You can choose any of them and verify your ownership. I would recommend and use the HTML tag method as it’s the easiest and simplest way.
- Copy the meta tag and don’t close this tab
- Login to your WordPress site
- Go to the “Appearance” ➡ “Theme File Editor”
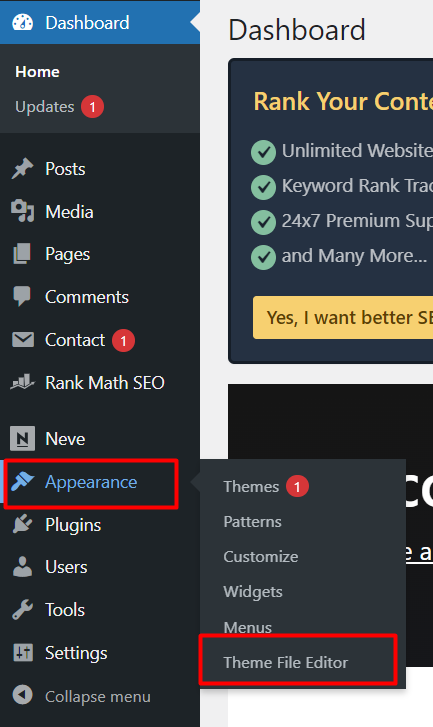
- Navigate to header.php file
- Paste the HTML tag inside the <head> </head>tag
- Click on “Update File”

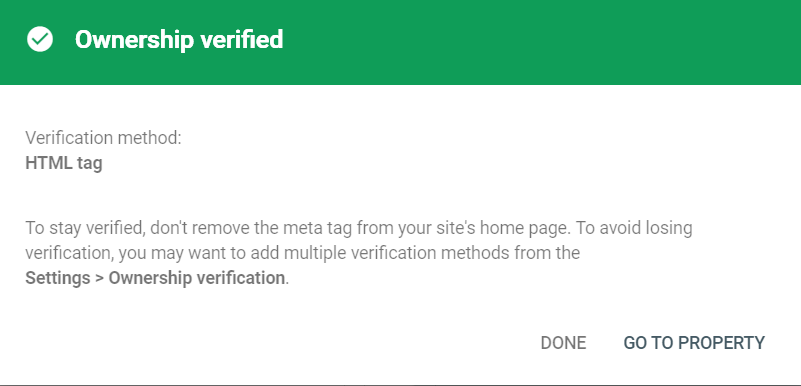
- Go to your Google Seach Console and click on “Verify”
- It’ll take a few seconds and you can see the Ownership verified message on a pop-up window
Good to Know: Google Search Console, formerly known as Google Webmaster Tools. It originated as Sitemaps in June 2005, initially serving as an XML tool.
How To Use Google Search Console
After verification, Click on GO TO PROPERTY. You’ll be directed to the Google Search Console dashboard. Here, you’ll see an overview of your site’s performance, including search analytics, indexing status, and any issues detected by Google.
Now, I’m giving a quick overview of how you can use the Google Search Console tools to improve your website’s performance:
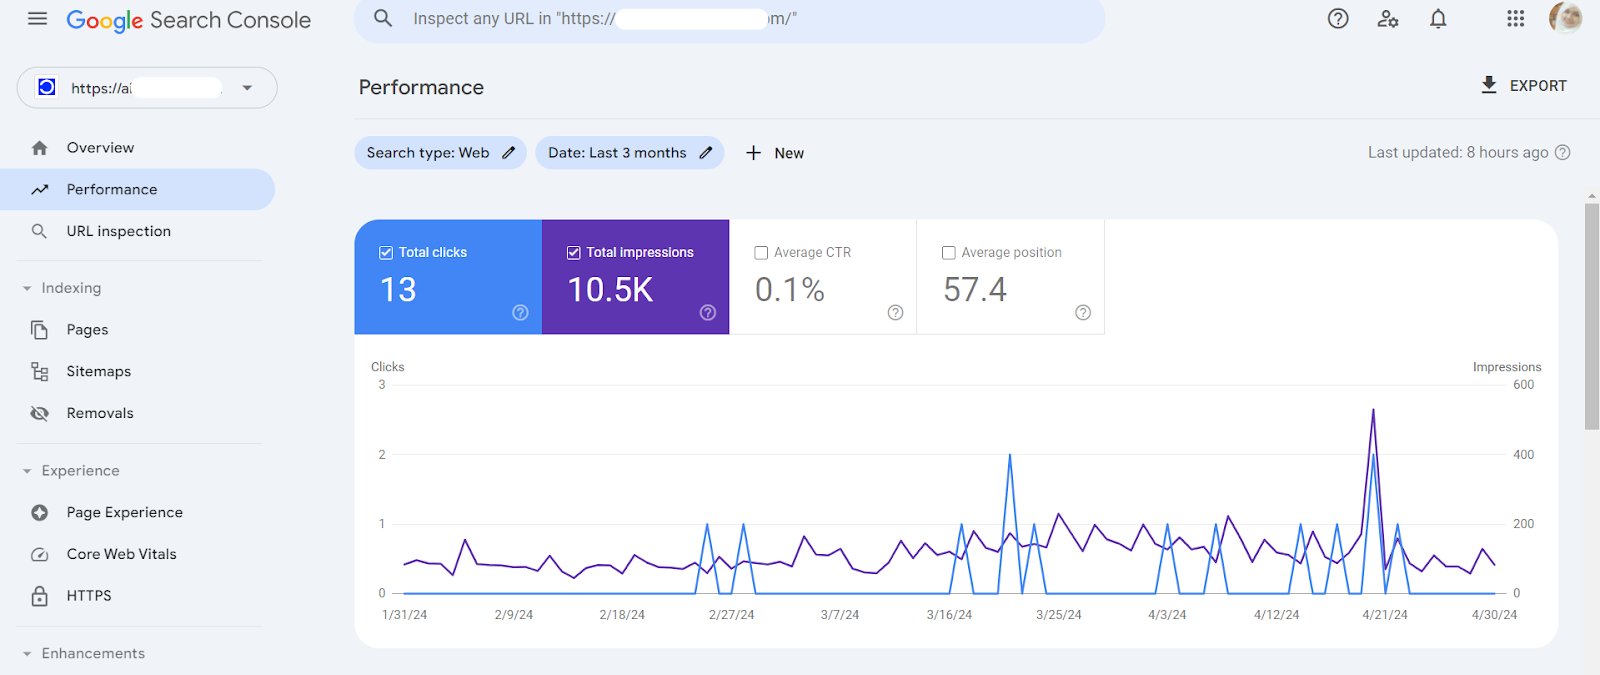
✅ Review performance: Explore the Performance section to see how your site performs in Google Search. You can view data on clicks, impressions, click-through rates, and average position for specific queries, pages, countries, and devices.
✅ Filters: You can narrow down your data using filters. For example, focus on specific queries, pages, or a particular date range.
✅ Compare Data: Compare data sets to identify trends. For instance, you can compare search engine results from different countries or mobile vs. desktop traffic.
✅ Check index coverage: Go to the Index Coverage report to see which pages of your site are indexed by Google and if any issues are preventing certain pages from being indexed.
✅ Submit sitemaps: Submit XML sitemaps of your website to help Google crawl and index your pages more efficiently. You can do this in the Sitemaps section.
✅ Monitor mobile usability: Check the “Core Web Vitas” for the Mobile Usability report to ensure your site is mobile-friendly or not. Fix any issues that may affect the user experience on mobile devices.
✅ Address security issues: Regularly check the Security Issues i.e. “HTTPS” section to detect and fix any security issues Google has found on your site, such as malware or hacked content.
✅ Stay updated: Keep an eye on notifications and emails from Google Search Console, as they may alert you to important issues or updates related to your site.
How Do I Export a Google Search Console Report?
You can gain valuable insights into your website’s search performance and SEO by exporting the Google Search Console reports. To export a GSC report,
- Choose the website property you want to export data from the list of properties associated with your account.
- Go to the specific section of Google Search Console where you want to export data, such as Performance, Index Coverage, Mobile Usability, etc.
- Adjust the date range to analyze data for a specific period, such as the last 7 days, 28 days, or a custom range.
- Use filters (if applicable) to narrow down the data based on specific criteria, such as countries, devices, queries, or pages.
- Once you’ve configured the report to your liking, you can export the data in various formats, such as CSV, Excel, or Google Sheets, for further analysis or sharing with stakeholders.
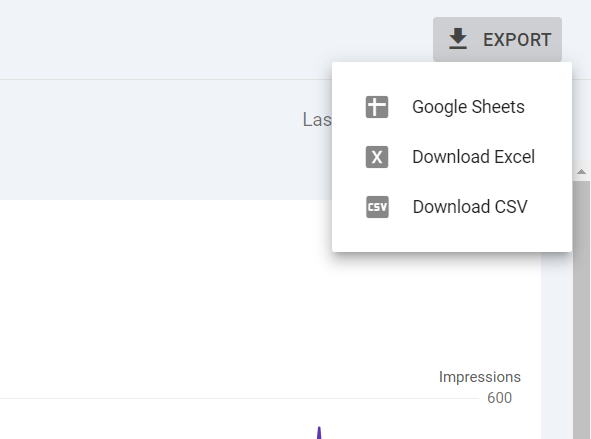
- Click on “EXPORT”
- Choose the preferred file type
- It’ll start downloading the report automatically
Following these steps, you can easily export data from Google Search Console and analyze it further in a spreadsheet or other software such as Looker Studio for deeper insights and analysis.
If you want to learn how to connect Google Search Console and Looker Studio or any other tutorial, feel free to comment below. 🤗
